Level: Beginner What you learn: basic primitives, basic operations, modelling volume from a shape.
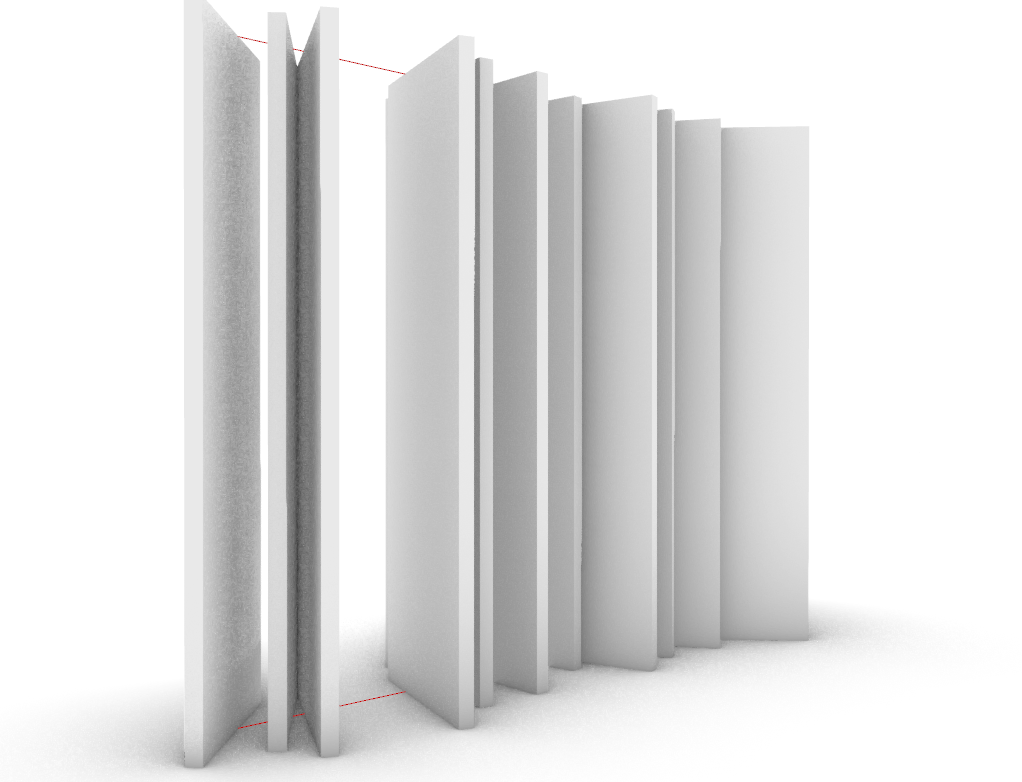
Steps
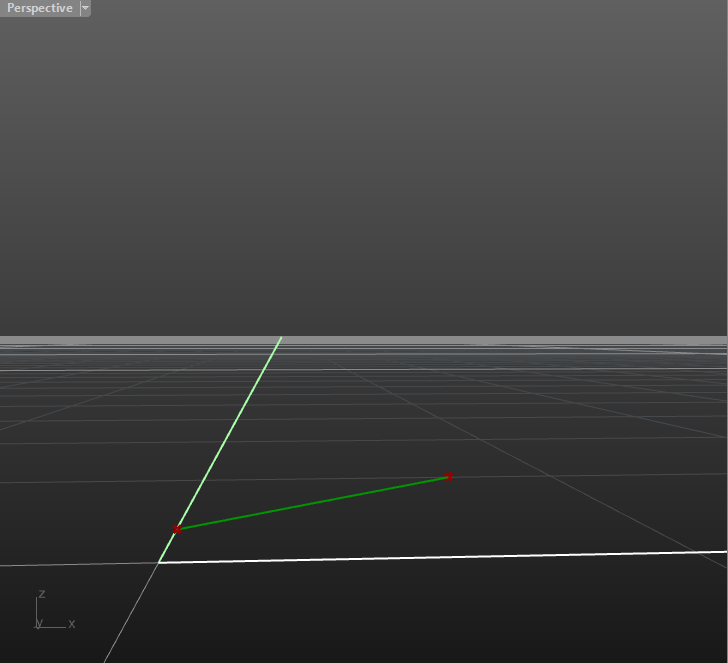
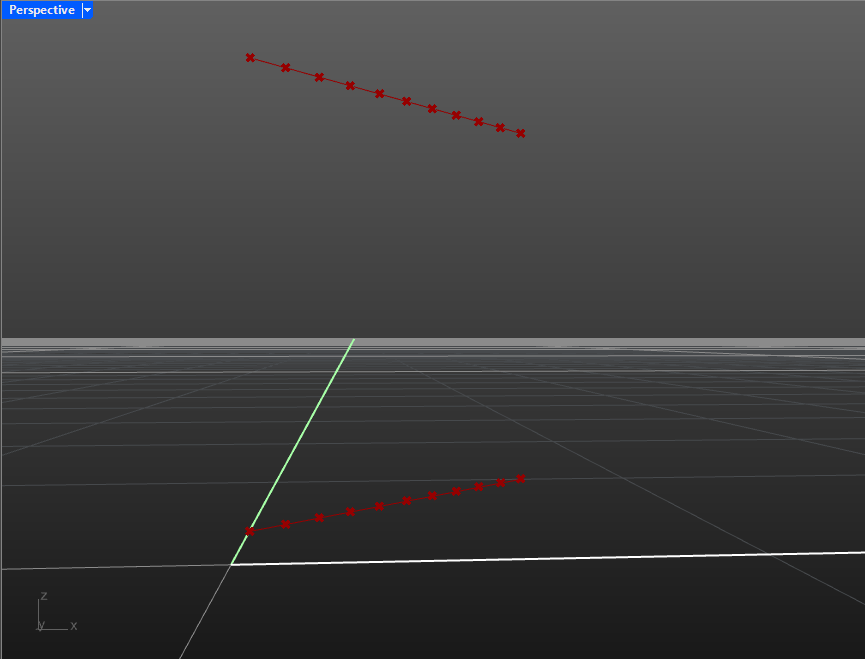
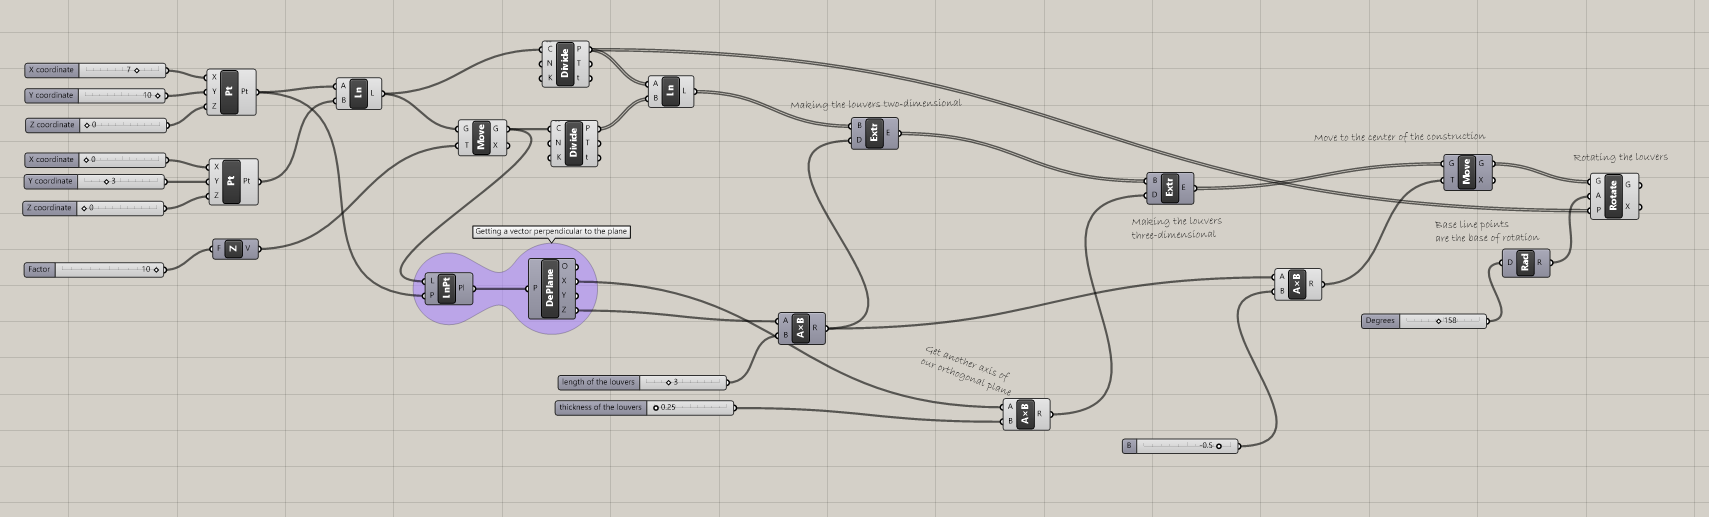
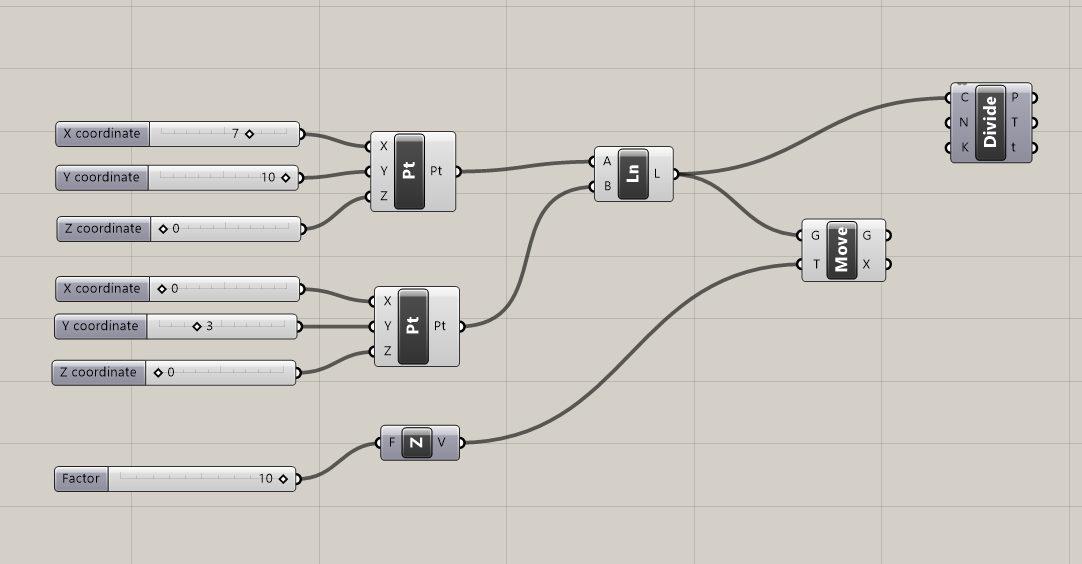
- Create a line that the louvers will be placed onto. This line will be the lower bound of the louvers, the base line. 🎢 Bonus: create a curved line
Illustration
👀 Hint
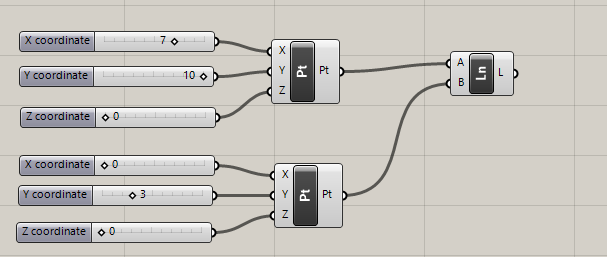
Hint: line can be composed of two points. Create them first, then join them into a line.
⚙️Solution
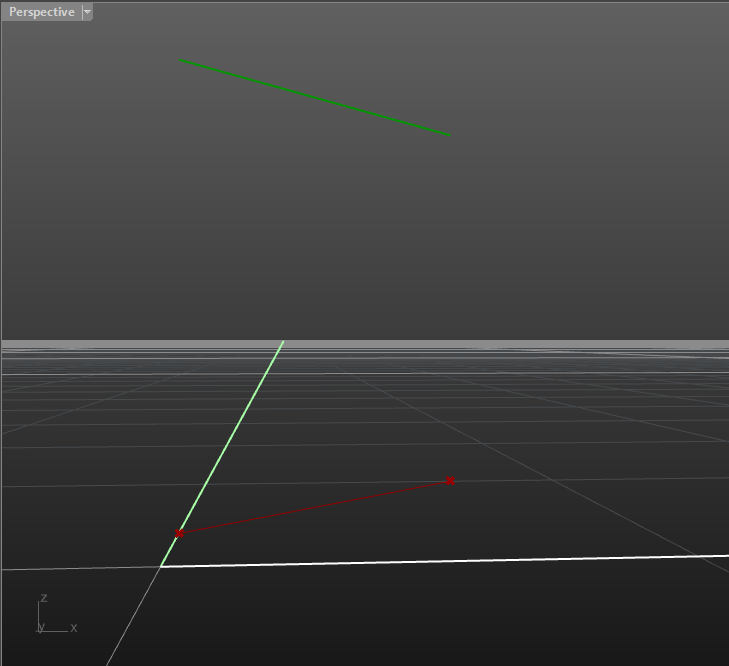
- Create the line that limits the louvers from the top. This line will be the upper bound of the louvers. 🎢 Bonus: lines can differ in length (e.g. lower line could be 1 meter and the upper one could be 1.5)
Illustration
👀 Hint
Hint: you can make a new line or move the base line to some distance.
⚙️Solution
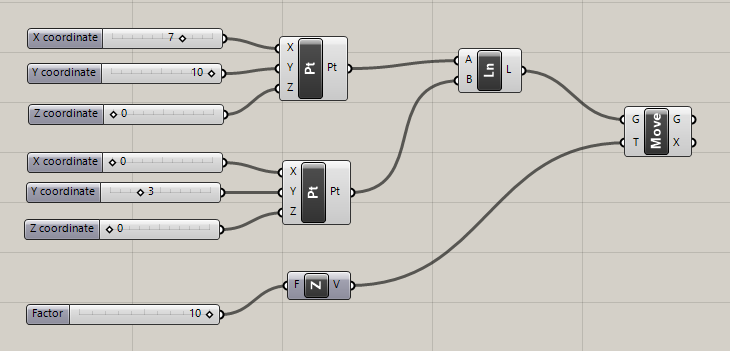
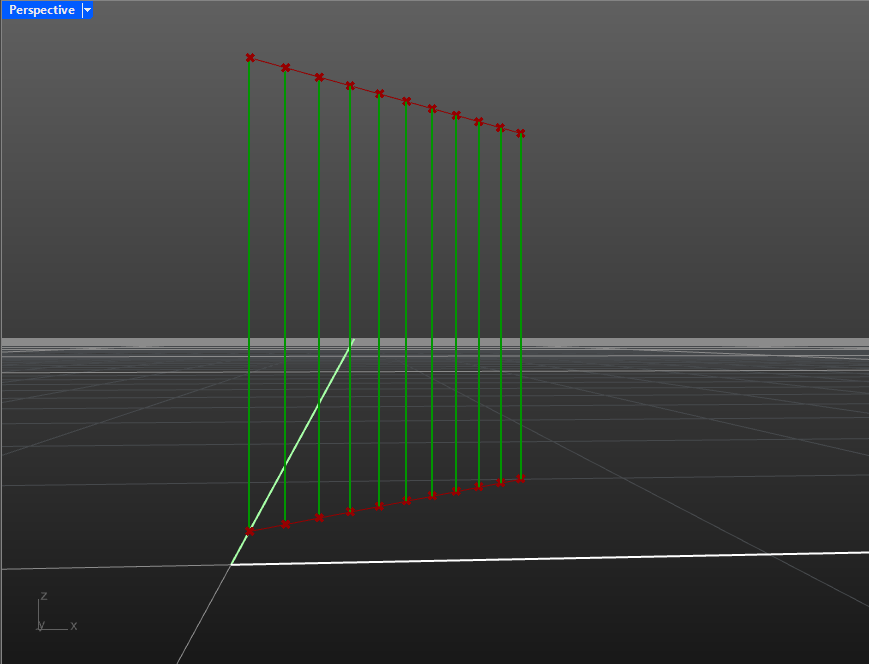
- Get 10 points from the lower line. At these points we will place the louvers later.
Illustration
👀 Hint
Hint: you only need to divide the line into segments, there is no need to actually create points for that.
⚙️Solution
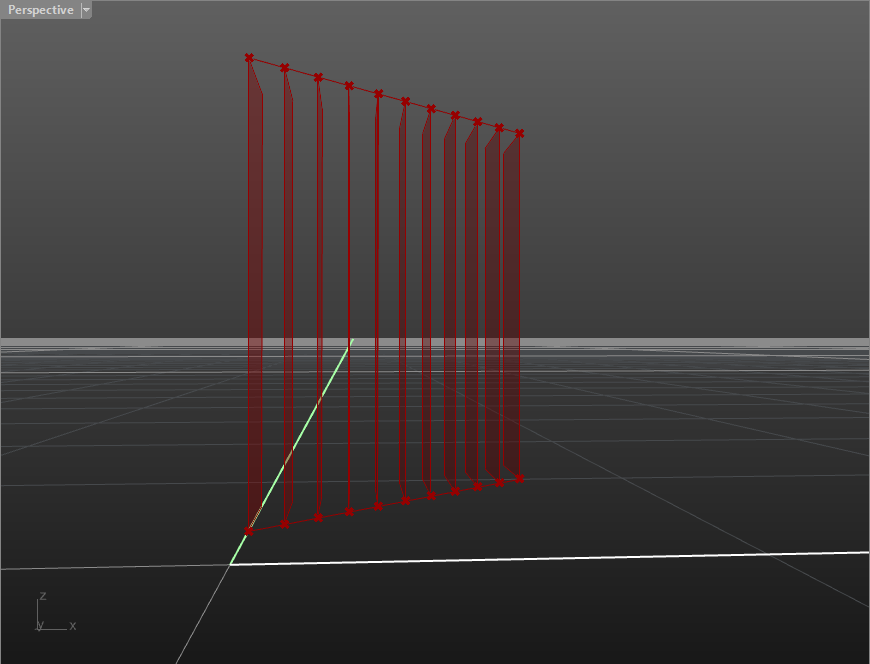
- Get 10 corresponding points from the top line and connect them to the base line points.
Illustration
👀 Hint
Hint: you can reuse the previous division operator. Then the segments of both lines will have the same proportions.
⚙️Solution
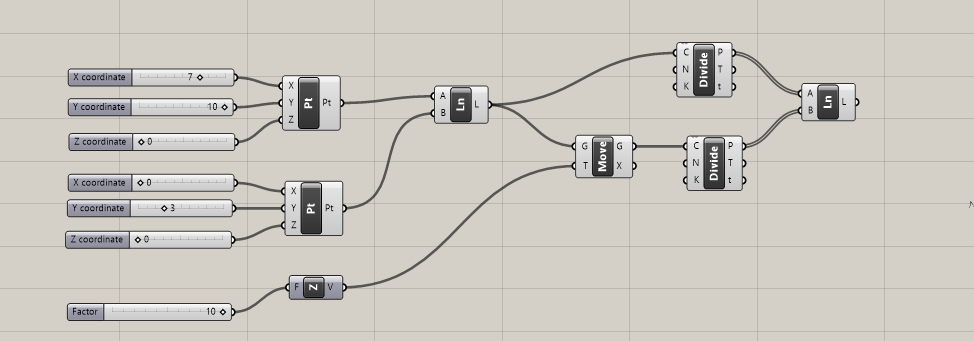
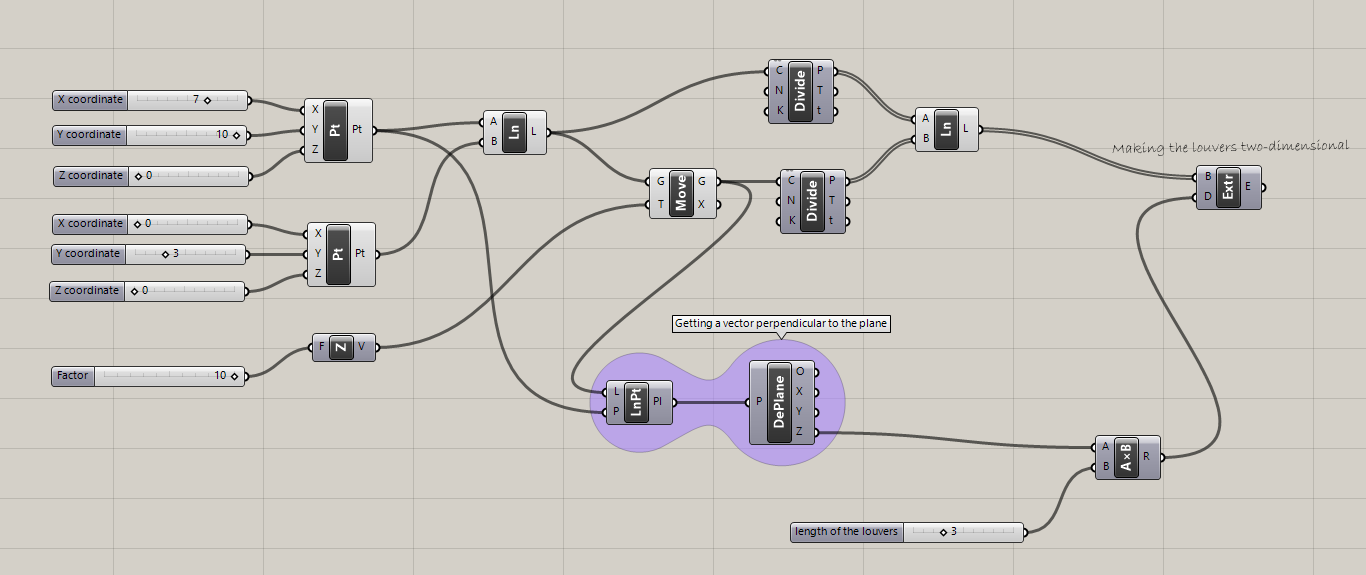
- Now we have the base for our louvers! Great! The only part left is to make 3D shapes out of existing lines. First, let’s extrude each line and create a plane out of it. 🎢 Bonus: lines can be extruded along another line. It means that your louvers can have a more complex profile than a simple rectangle. Try to make it curved.
Illustration
👀 Hint
Hint: you likely want the extrusion to happen perpendicular to the base line and the louver plane.
⚙️Solution
More flexible solution:
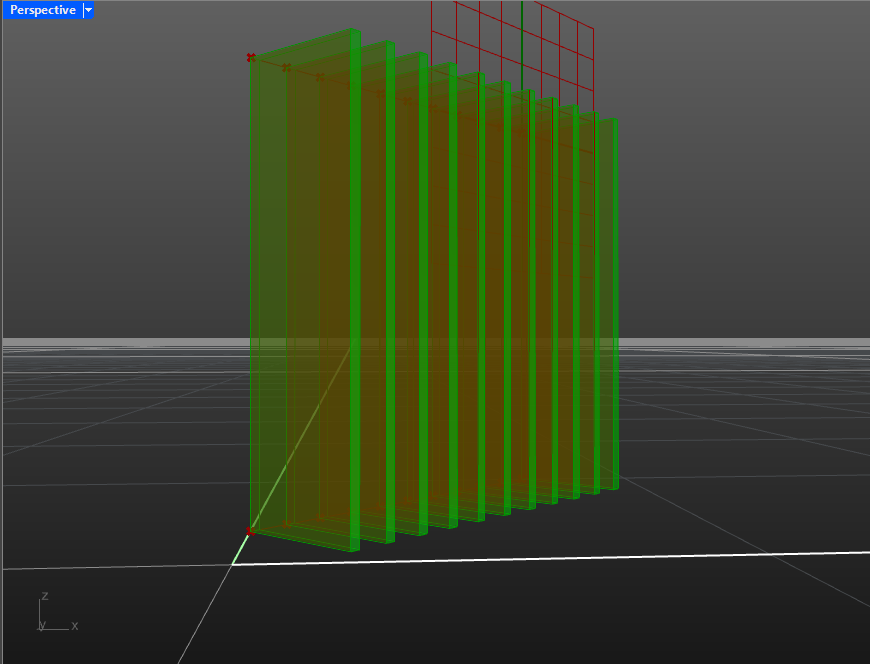
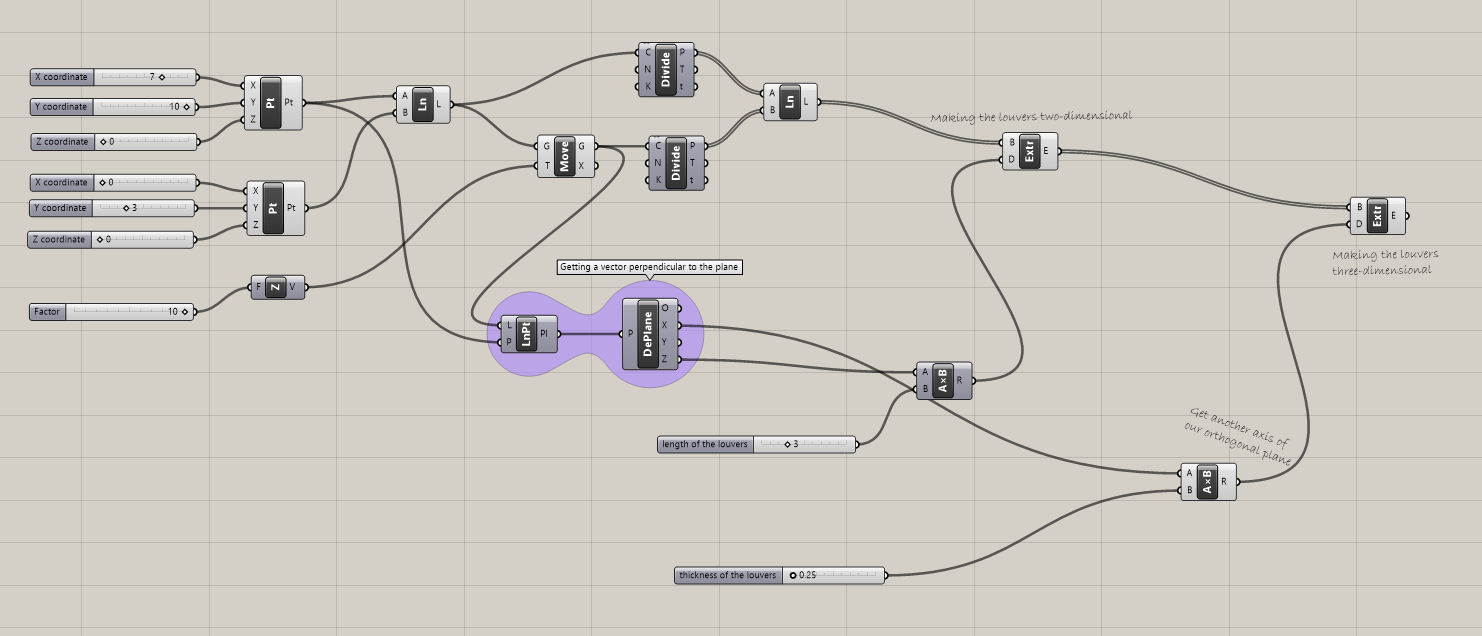
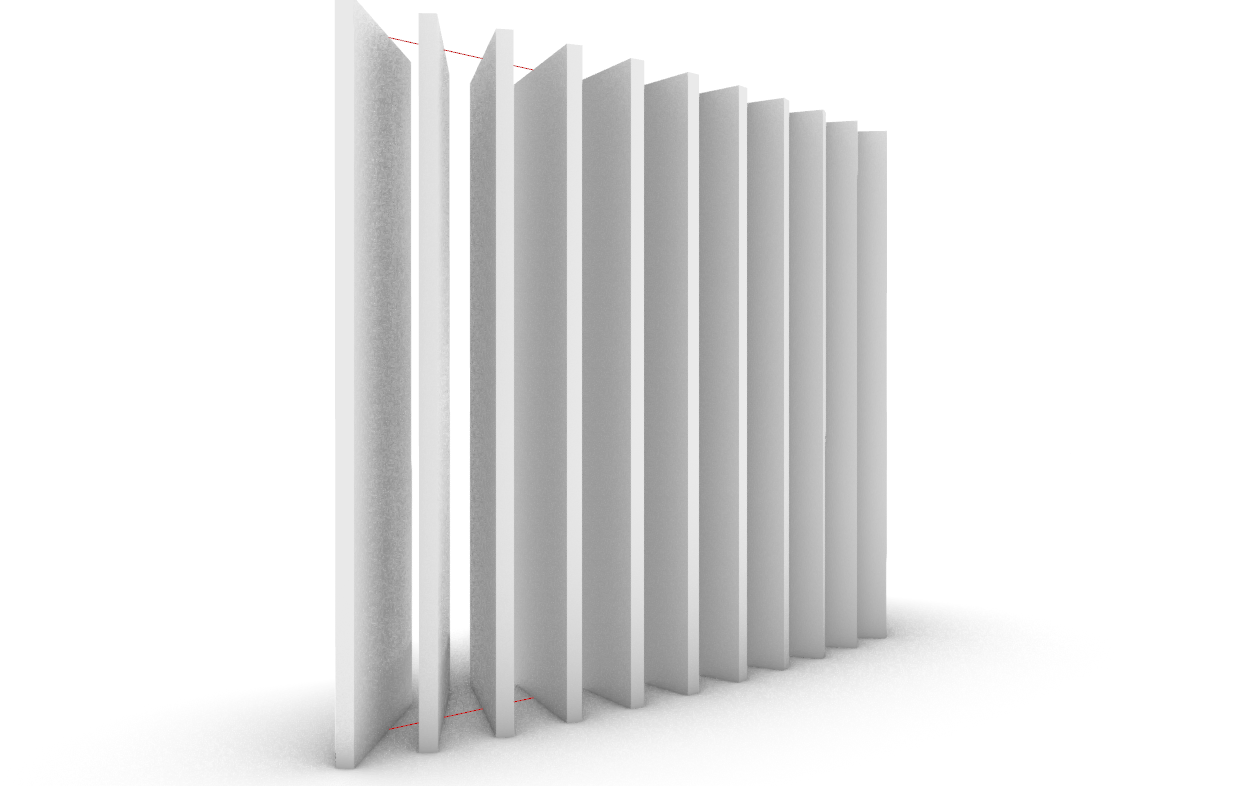
- Our louvers are getting more shape now, time to give them volume and convert from 2D planes into 3D forms. Let’s extrude the planes into 3D boxes (parallelepipeds).
Illustration
👀 Hint
Hint: you likely want this extrusion to happen along the base line of the louvers. You can reuse this line as a vector direction or the module you have used in step 5.
⚙️Solution
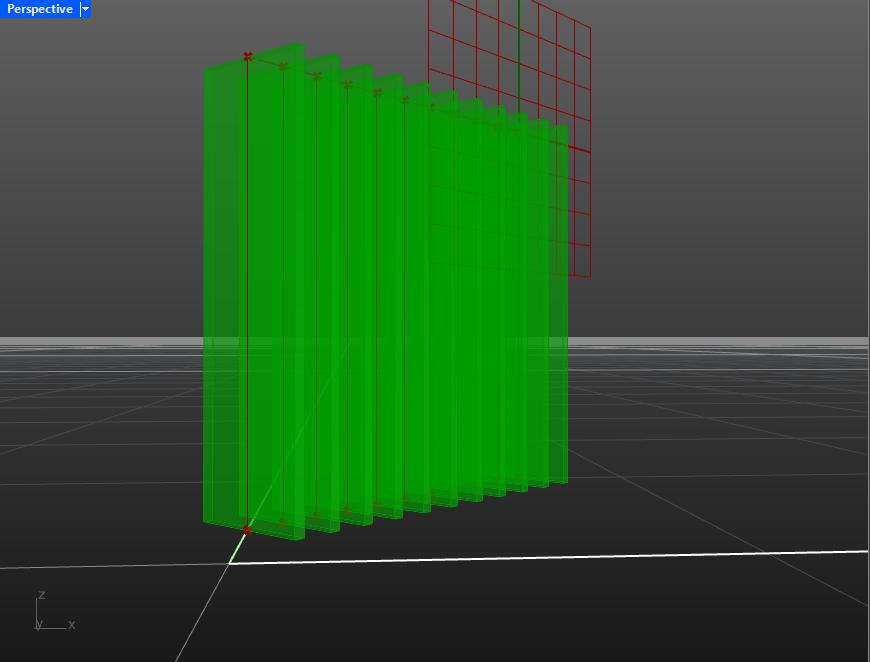
- Depending on how your louvers attach to the window construction you might want to move them. One common way to attach the louvers is by the center point. Let’s move our newly created parallelepipeds in a way that their center point lies on the base line.
Illustration
Note: the red points are situated in the center of the boxes.
👀 Hint
Hint: you can reuse the first extrusion direction.
⚙️Solution
-
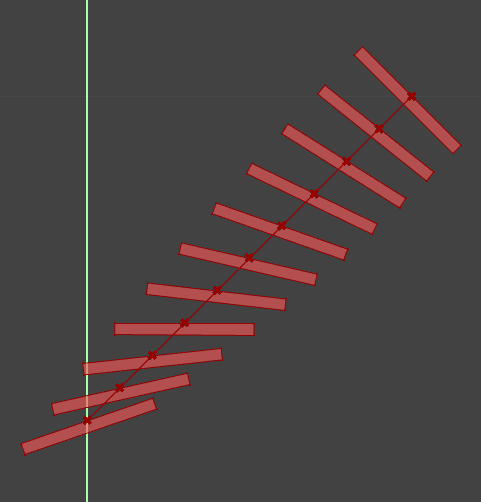
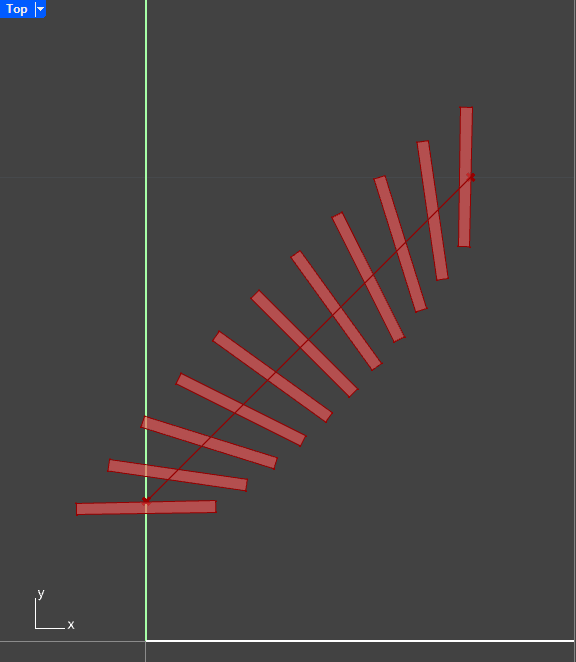
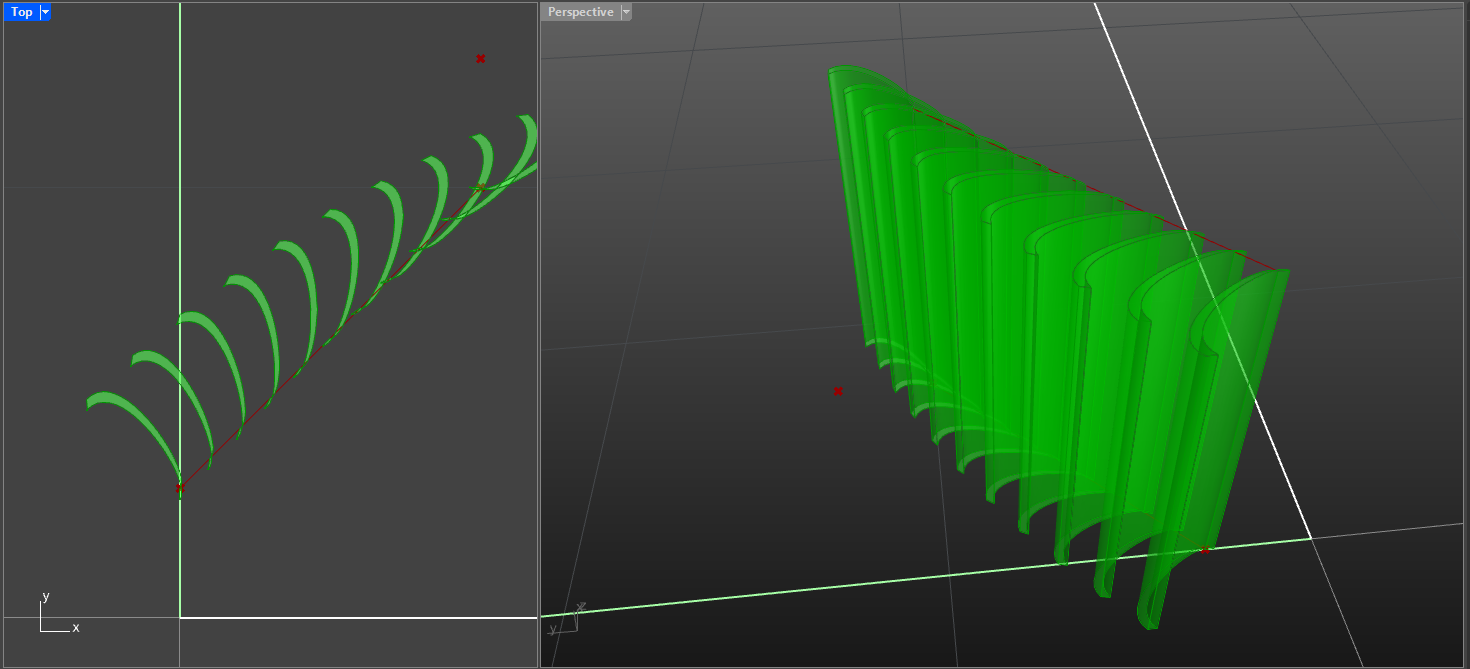
Louvers are ready! Now let’s rotate them, as that’s the main idea with having louvers :)
🎢 Bonus: assign different rotation angle to different parallelepipeds.
Illustration
Now you can control each module separately and change the profile shape by adding one module:
👀 Hint
Hint I: check the units the rotation module uses. Hint II: you can reuse the points that we’ve got by dividing the base line into segments.
⚙️Solution
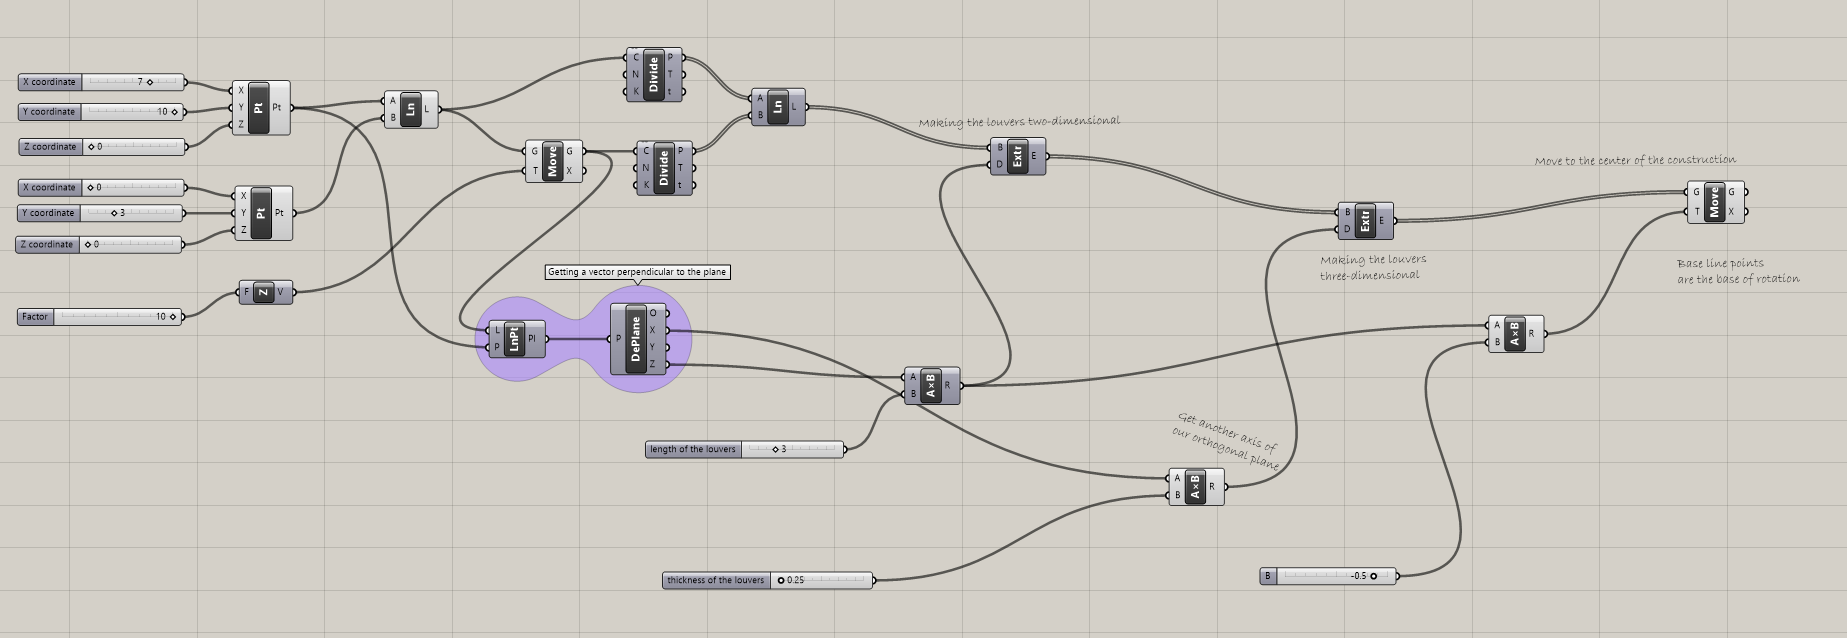
Check out the full script if you get stuck!
This exercise has been developed under the workshop for Umeå universitetetfor the course of Elena Vazquez Peña Architectural Design Studio HT23-24.