Level: Beginner What you learn: basic primitives, basic operations, loft, arrays, surface operations.
Steps
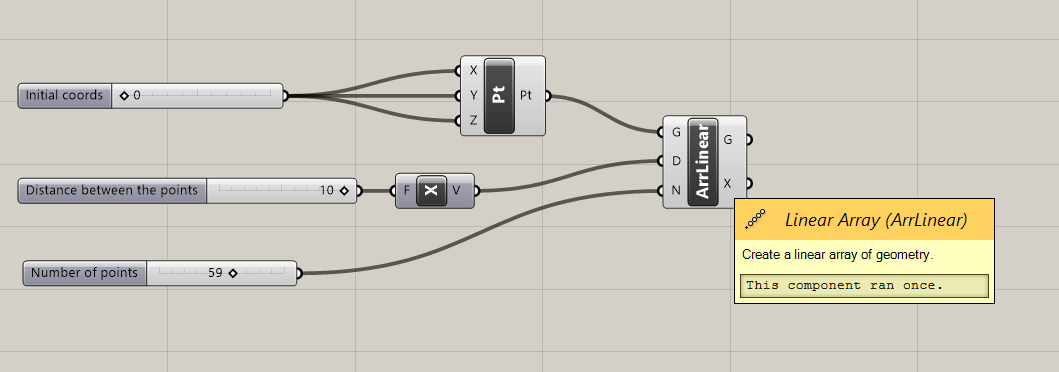
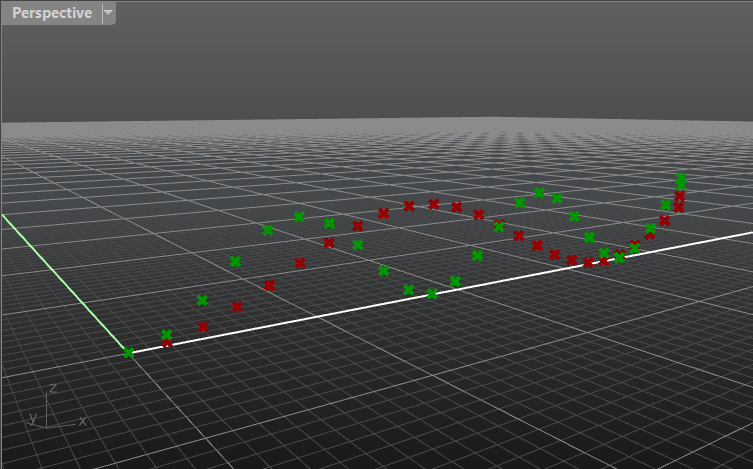
- Create a number of points in a straight line that would define our curve. The distance between these points does not matter.
Illustration

👀 Hint
Hint: You can divide a line into a number of points. Alternatively you can copy a point multiple times on a certain axis.
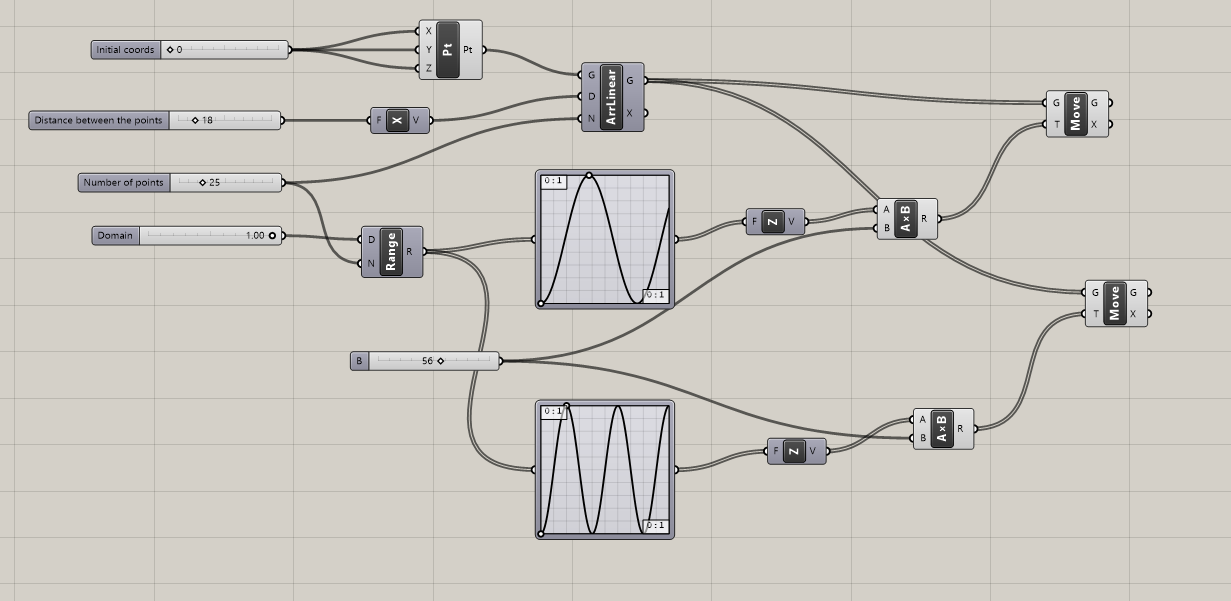
⚙️Solution
-
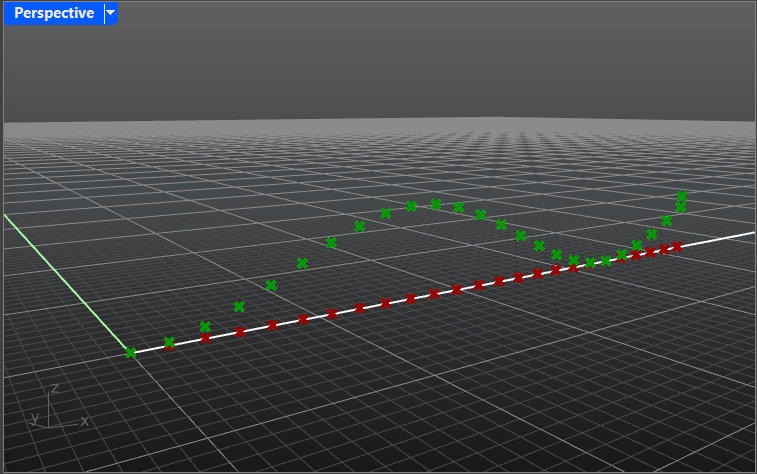
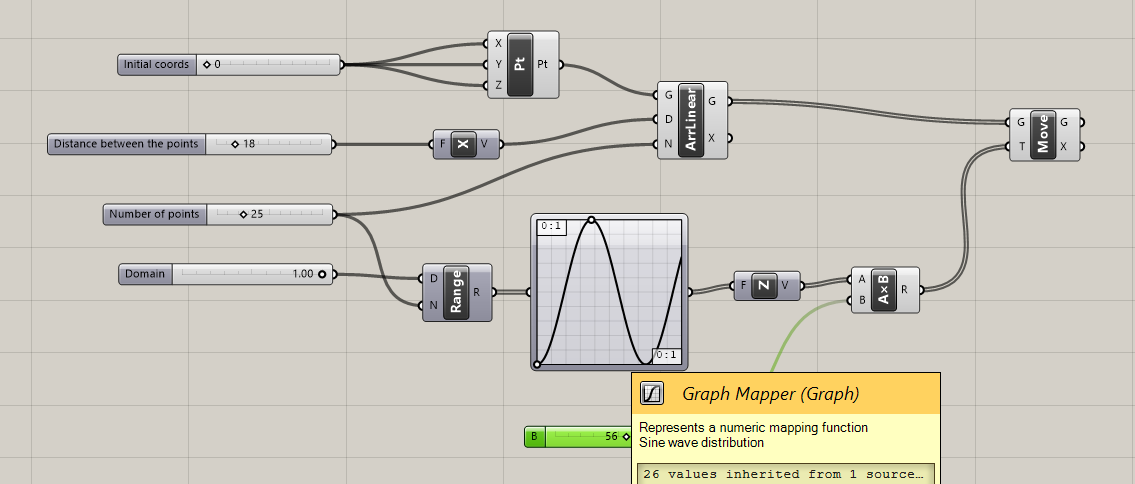
Move the points along Z-axis on a different amount of units, so that they create a sinusoid curve.
Illustration
👀 Hint
Hint: you can use a module called Graph Mapper and choose the type of curve by right-clicking on it. This module takes in a Range parameter, defining the lower and the upper bounds of the curve.
⚙️Solution
- Create one more curve, with the same number of points as a previous one but with a different curvature. You can choose another curve type (e.g. Gaussian) or modify the parameters of the previous one, making it lower/higher or tighter / wider.
Illustration
👀 Hint
Hint: you can copy the modules used to shift the points and choose a different curve type.
⚙️Solution
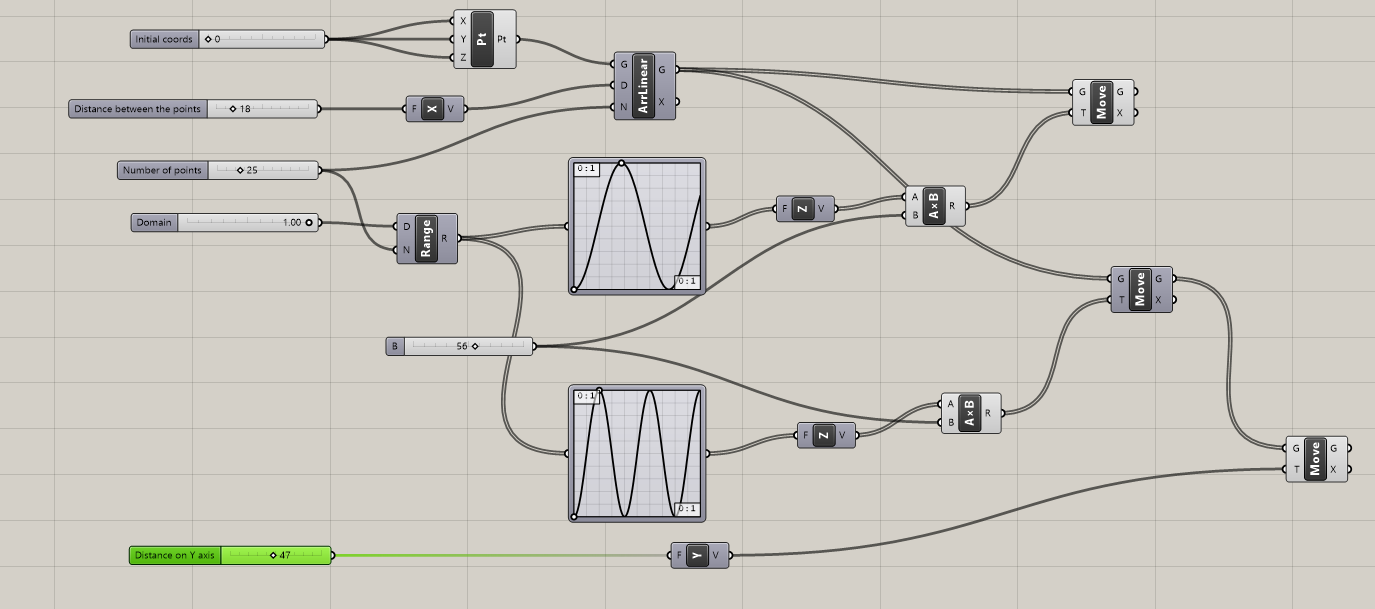
- Move the new curve some distance (span) from the first one.
Illustration

👀 Hint
Hint: move the points of the second curve along Y-axis.
⚙️Solution
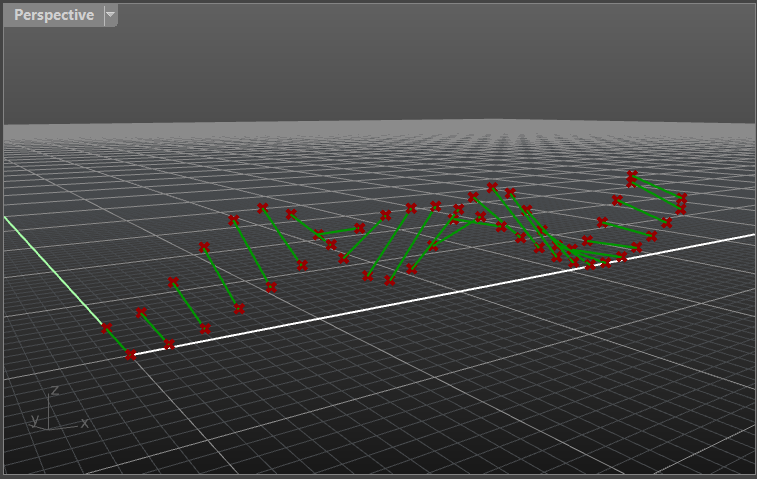
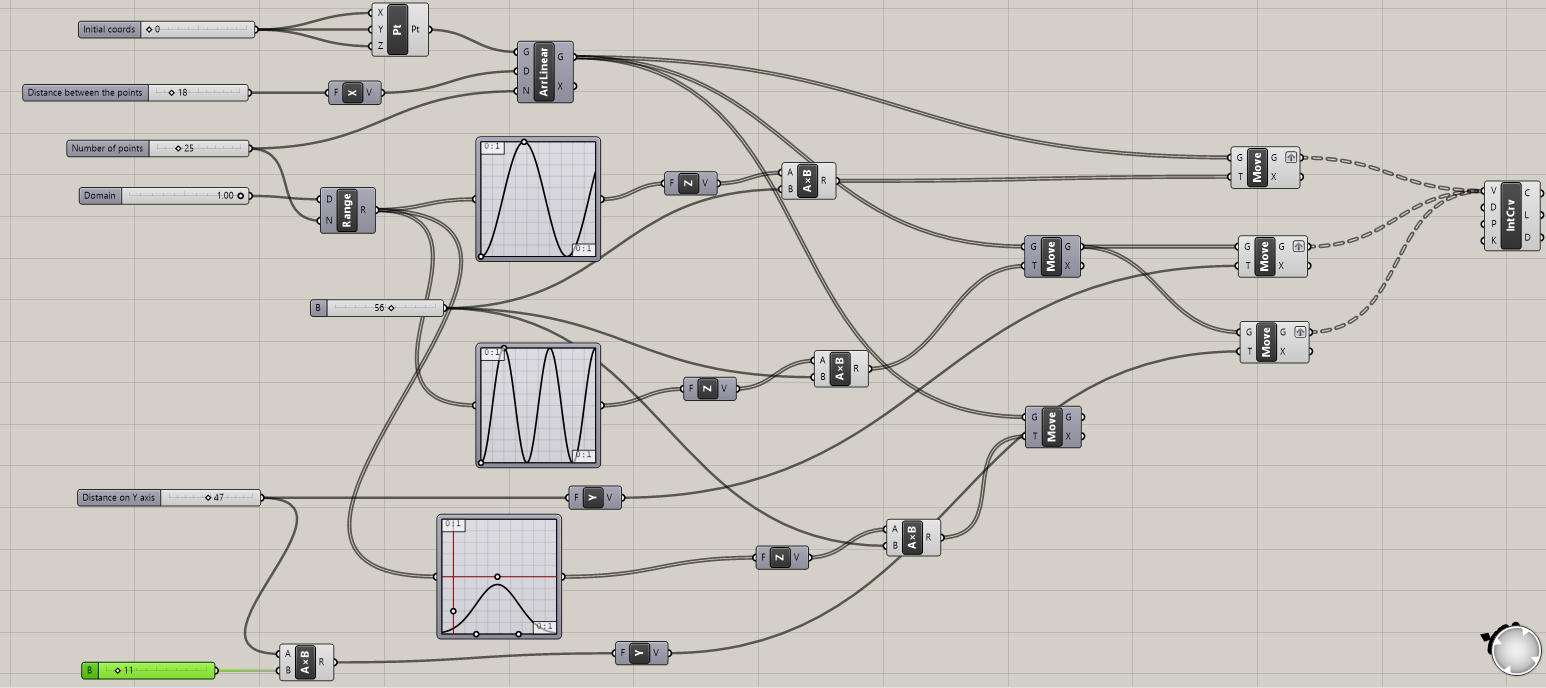
- Connect these points with the lines. These lines can be straight or curved, based on the type of shape that you want to achieve.
Illustration
👀 Hint
Hint: If you want to connect several arcs and make a smoother surface you would want to use curved connectors. This can be achieved with the Interpolate module.
⚙️Solution

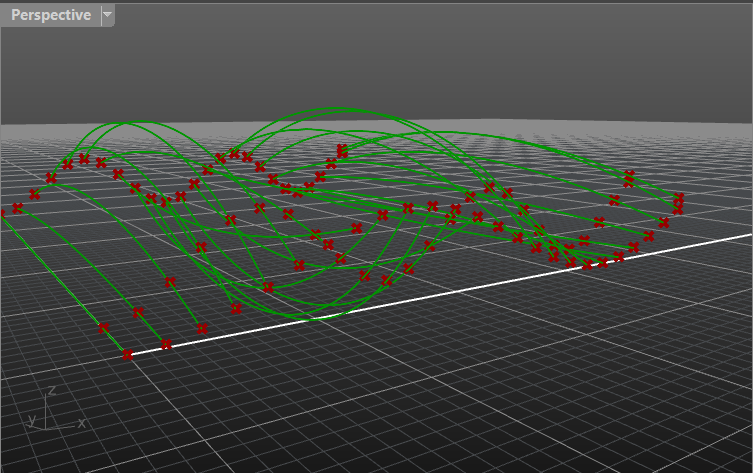
- Let’s add a third curve beside the previous two and connect the points of all the three.
Illustration
👀 Hint
Hint: take a look at Interpolate module. You can use the same module for all the three curves
⚙️Solution
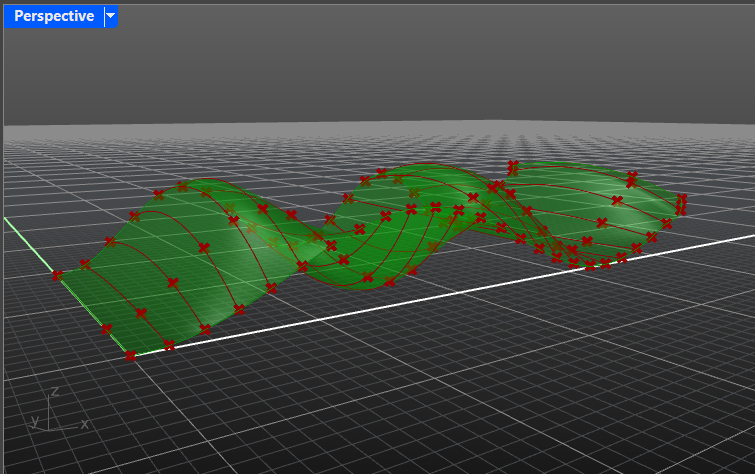
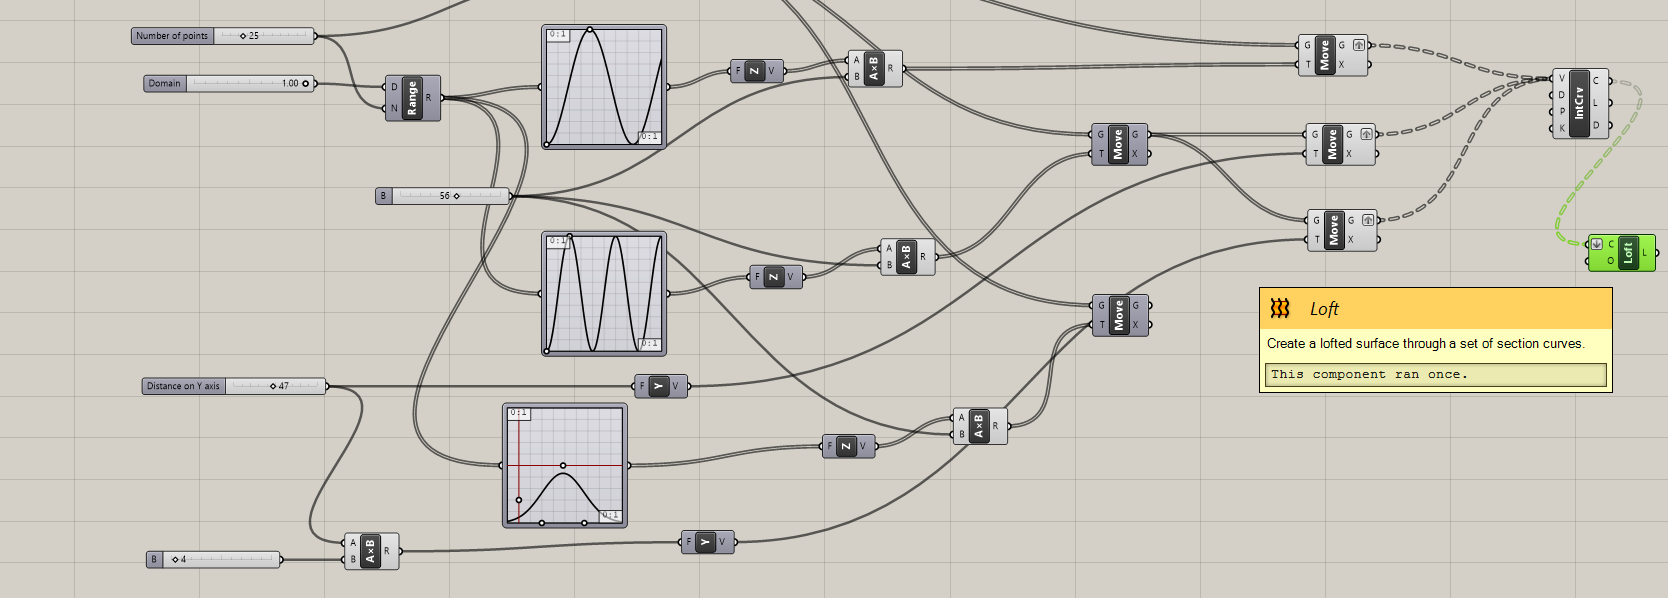
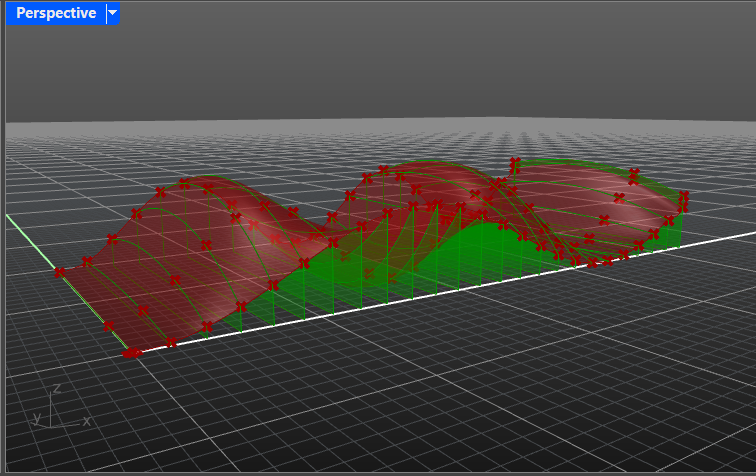
- Bridge the gap between the adjacent lines by creating small surfaces between them.
Illustration
👀 Hint
Hint: one of the ways to achieve it is by using the Loft module.
⚙️Solution
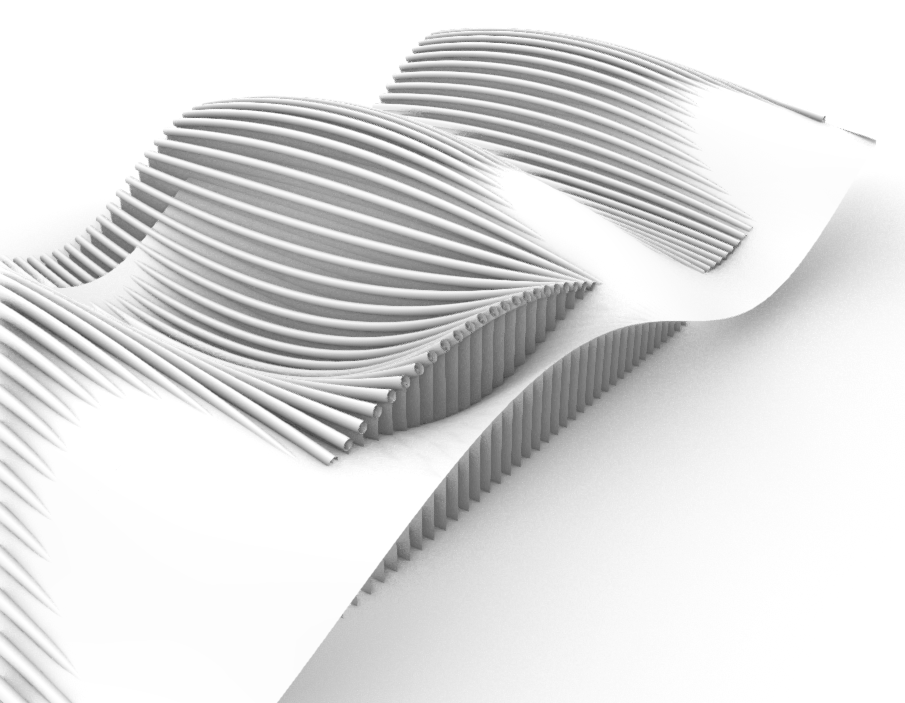
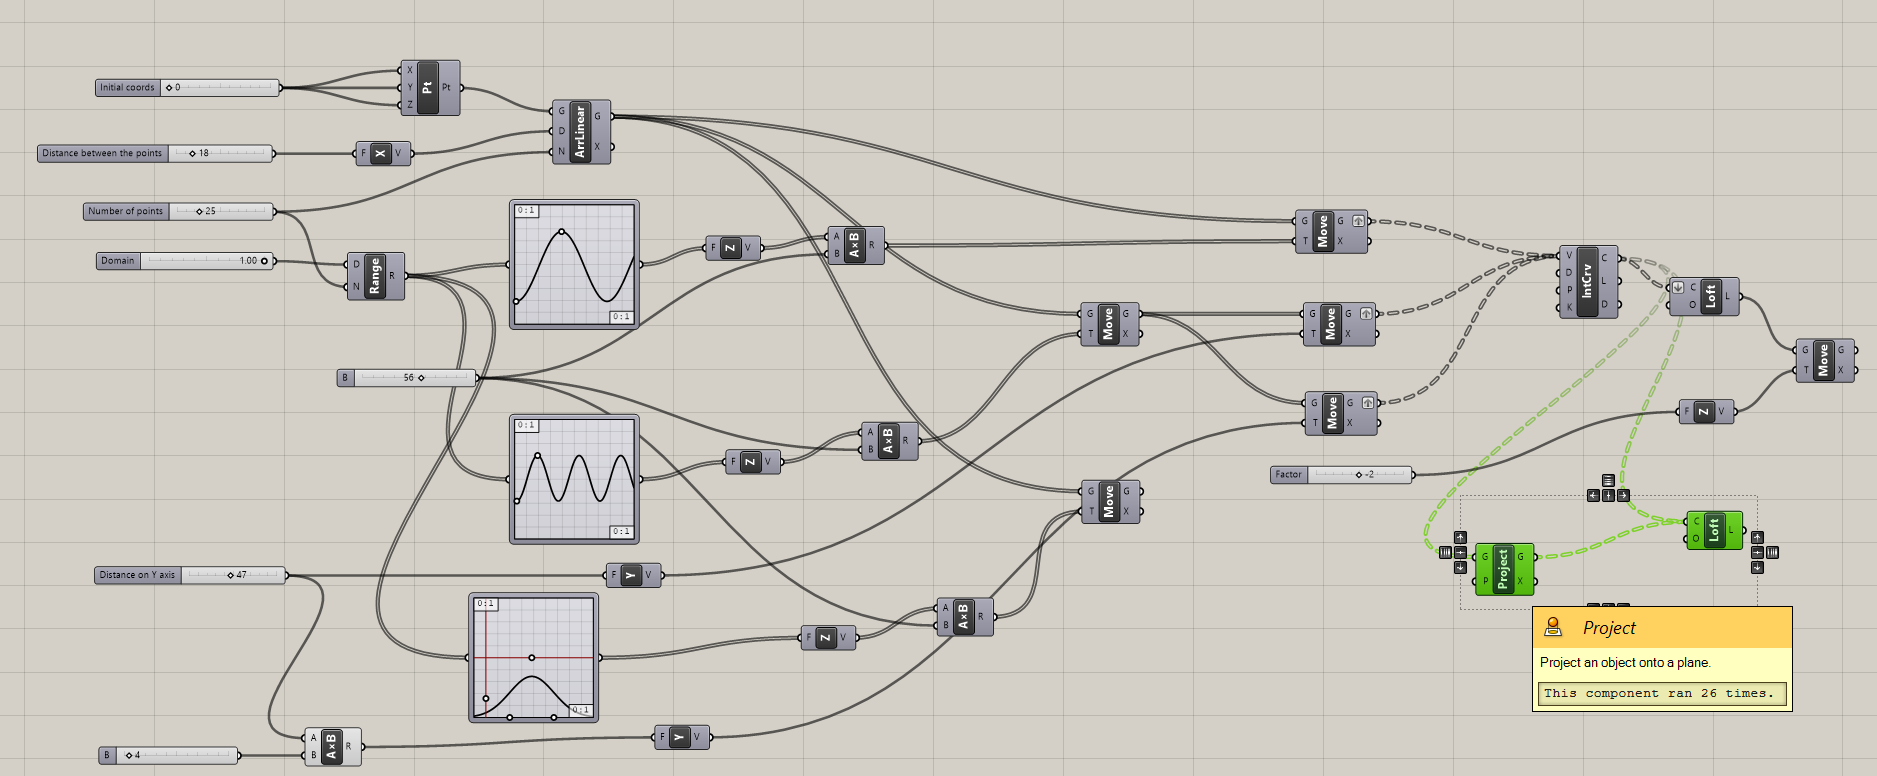
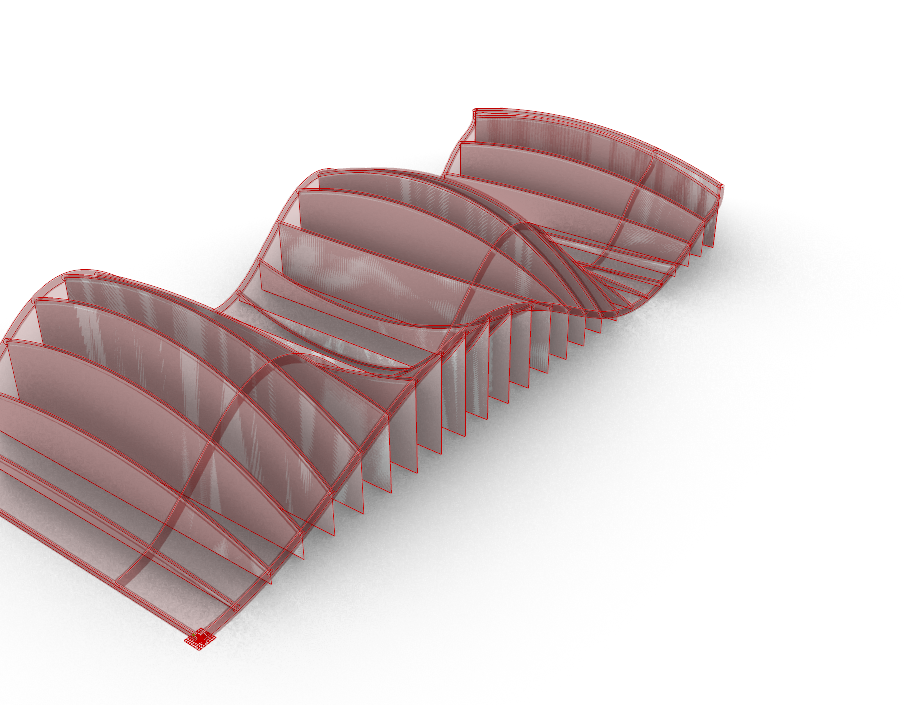
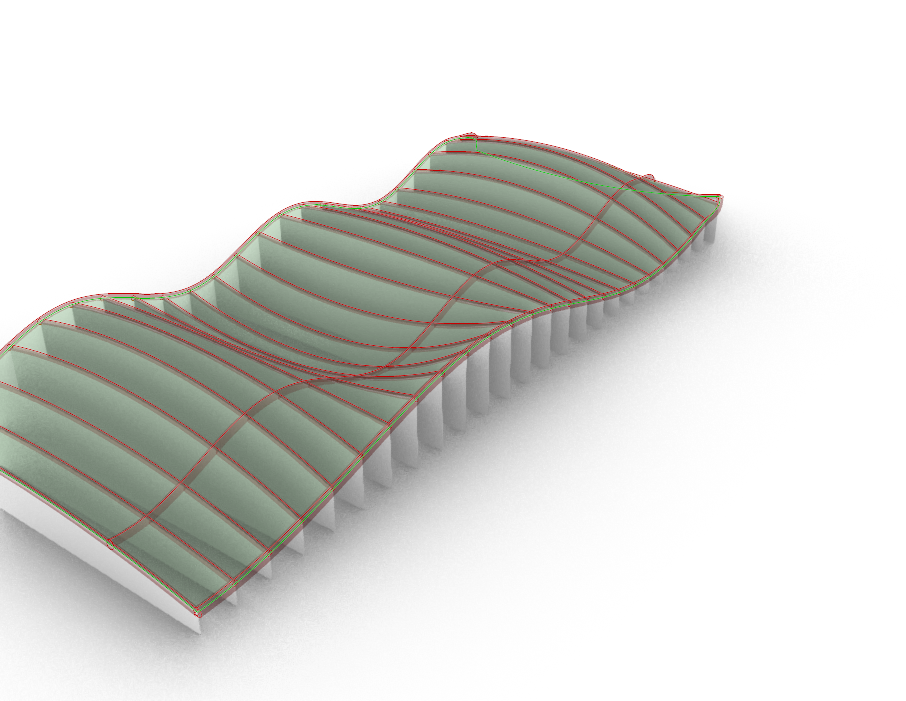
- The surface is ready! Let’s add some supporting constructions to carry it. Create beams that are flat on the bottom side and follow the surface’s curvature on the top.
Illustration
👀 Hint
_Hint I: you can translate or project (module Project) already created geometry on the bottom plane.
⚙️Solution
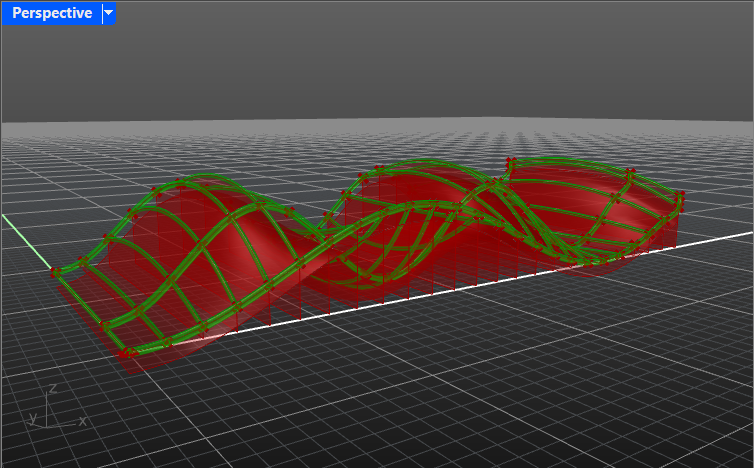
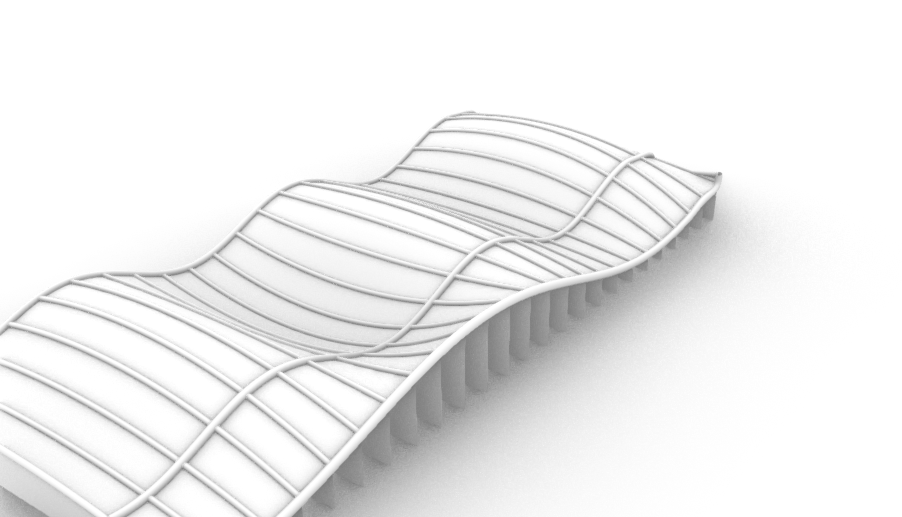
- Let’s create the rails that carry our surface. Give volume to the initial three curves (the longitudinal ones). Check Surface/Freeform tab.
Illustration
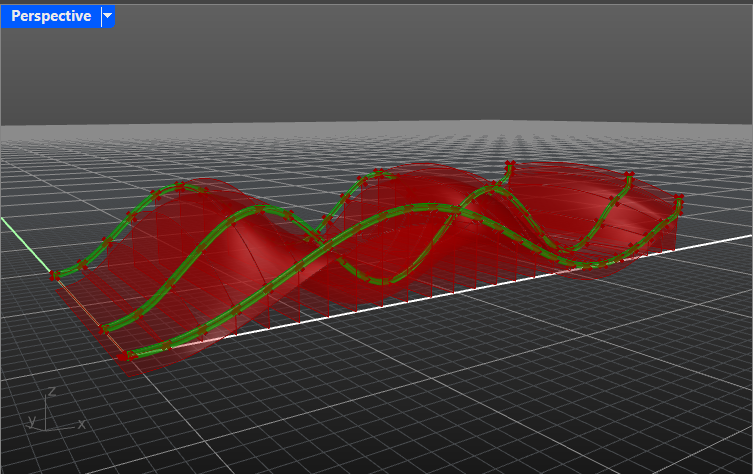
👀 Hint
Hint: take a look at Pipe module.
⚙️Solution
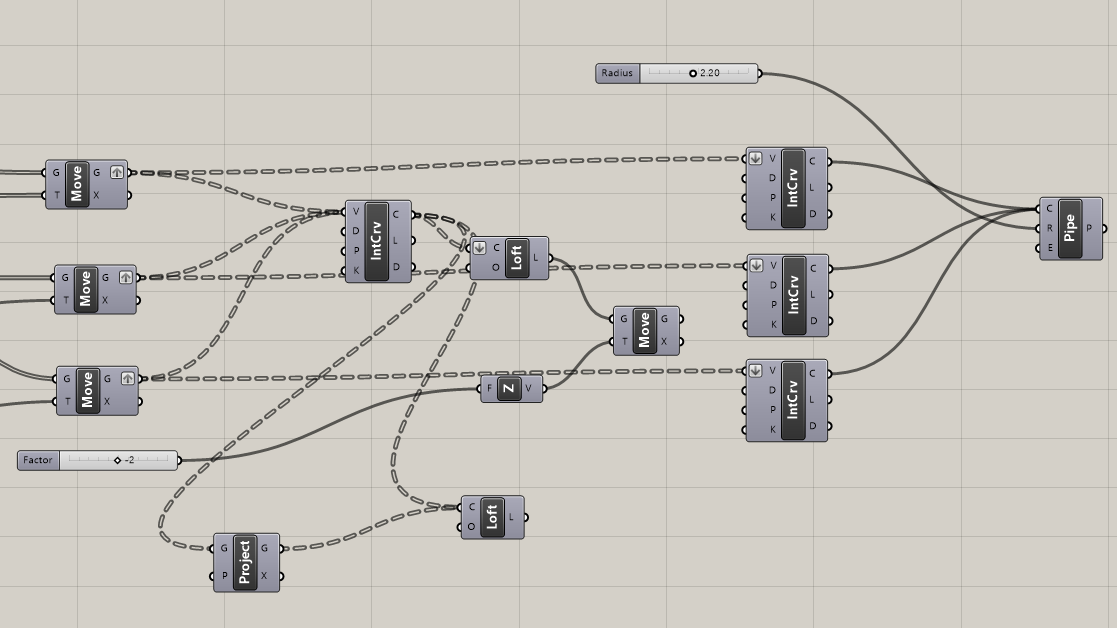
- Give volume to the perpendicular curves as well.
Illustration
👀 Hint
Hint: you can use the Pipe module.
⚙️Solution

Check out the full script if you get stuck!
This exercise has been developed under the workshop for Umeå universitetetfor the course of Elena Vazquez Peña Architectural Design Studio HT23-24.